The Workflow
Designing a website with Adobe Muse…
Muse (code name) by Adobe is graphic-based web design tool. Contrary to traditional design tools, Muse requires almost zero programming knowledge and it takes only minutes to have an official website on the Internet. The program itself comes with a handful of pre-made widgets such as photo slide-shows, tool tips, and menu bars. In my opinion, it has been the greatest web design discovery I have made thus far. In the event that you do want to incorporate some custom HTML or other code, Muse provides an arbitrary HTML object to make it all possible. My opinion of this program is that it’s very easy to use, has a lot of capability and saves me a ton of time.Ok, enough about the program. Let’s talk about the details…
Building a website with Muse can be boiled down to this process:
- Create your sitemap. (The pages you want on your site, i.e. Home, About, Contact, Services, etc.)Not to be confused with an XML sitemap that you would submit to Google. We’ll talk about that later.
- Create your assets (your graphics, buttons, logos, images, etc.)
- Write your content (the text and information that will appear on your website.)
- Add your widgets and embed your tools/ads. (Includes photo galleries, videos, Facebook/Twitter Feeds, etc.)
- Add a contact form or any other arbitrary HTML.
- Upload your website to the internet.
It’s really that simple! For the first time creating a website, Muse proved to be a great tool to get the job done. It’s possible that many graphic designers will be using this software to make their web design dreams come true. I would also like to mention that regardless of the ease of use, I still had to learn a lot in order to get the job done. I had to search up a number of tutorials on websites and asset creation (graphics) but am glad that I took the time to do all that learning.
So to continue the tutorial, I will go over each step in detail and post pictures along the way to show you the process.
Create a sitemap.
Plan your pages and get your ideas out in front of you.
When you first start a new Muse project, the first thing you will see after confirming your page size is the Plan Page. Muse uses a Plan, Design, Preview, Publish workflow and makes designing a website quick and easy. The Plan page is where you plan the structure or your pages and essentially create your sitemap. For this particular web design I included a Home, About, Our Classes, Testimonials, and Contact page with a couple sub pages under “Our Classes.”
Master Pages
Muse has an upper hand on most web designing programs due to the use of Master pages, a major time saver.
Master pages are template pages that you create and then you simply apply the Master page to any page that you desire. A good example of how to use a master page would be when you have a logo and heading in place and you want to repeat the logo and heading across all your pages. You can place your logo and heading in a master page and then assign that master page to the rest of your pages. There’s no need to copy and paste any more. This decreases the amount of time you spend adding the same menu bar and logos at the top of your pages.
Creating a Master Page
By default, Muse has one Master Page already defined. To repeat your logo and menu across all your pages all you do is add a menu bar and logo once on a Master page and then apply the Master page to the pages you want to have a logo and menu bar.
(NB: You can apply a Master page by right-clicking on a page in the Plan view and select the Master page under “Masters.”)
For a full explanation of all features and tutorials you can head over to: Muse Video Tutorials
The site planning is definitely the easiest part of the process but by no means less important than any other steps. Let’s continue with the next part of the Muse web design process…
Create your assets.
Design buttons, logos and other website graphics.
Creating an attractive site using stylish layouts and trendy button graphics.
Here’s your opportunity to get really creative and make your own artistic and original design. The possibilities are endless when you’re not limited by the nature of programming.
The majority of beginner point webdesign artists get stuck here because they can’t create modern graphics. But don’t worry, you’re reading this article and that puts you ahead of the rest of the pack.
Every contemporary and current website today will have a ton of graphical assets that are created by a graphic artist using an image manipulation program such as Photoshop. These assets include Logos, Menu Bar designs, Custom button graphics, etc.
Although Muse can create it’s own buttons and graphics, it’s best to create your buttons and graphics in Photoshop or GIMP, a free software! So let’s take a step back from Muse for a moment and talk about how I created the assets used in my first website.
So, where did you get all your cool graphics from?
Probably most people who are making websites with Muse are trying to make a website with a bare minimum budget. I personally created all my custom buttons and site graphics using Photoshop. It didn’t take long to learn how to use Photoshop and create some cool looking buttons. So, if you’re not hiring a graphic artist to design your assets, here’s a list of some great tutorials on graphic design that you can follow and get some great results:
Web 2.0 Tutorials
How to Create a Web Design in Photoshop
Creating Buttons in Photoshop
There’s a whole lot of tutorials out there, you just need to spend a bit of time searching the right terms on Google. (Try something like, “web buttons in photoshop”)
When you’ve got your graphics, you can bring them into Muse under File –> Place…
Muse allows for the easy placement of images on the website canvas and once again speeds up the entire process of designing a website.
If you’re interested in me writing more about creating graphical assets in Photoshop or GIMP, leave a comment at the bottom of this page. Thanks.
Write your content.
Add your text and images to your website. Google loves text and images.
What is “content” anyways? Content in the internet world is mainly text and images. Pages that have plenty of quality content (text, images) are much more likely to rank higher on Google searches.
All you really need to know is that if you want Google to recognize your website, they need to match search terms to the text on your site. Your content should match the nature of your website and be related to your domain name. Having site content that matches your domain name and site title are big factors on Google. If there is no text on your site, Google won’t add your site to its index.
As it relates to my first website with Muse, I didn’t intend for thousands of people to view it, so writing lots and lots of text wasn’t that important. As long the needed information was given, I had accomplished my goal.
Note: If you’re goal is have thousands of people come flooding to your website, I would suggest doing your research on Search Engine Optimization (SEO)
If you want me to write more about search engine optimization seo, leave a comment at the bottom.
Add your widgets and embed your tools/ads.
Widgets
Muse comes with a handful of pre-made widgets such as Slide Shows, Tool Tips, and Light Box Displays. It makes the process of creating a photo gallery as simple as drag and droping your photo’s. Contrary to the old, src=”http://yourdomain.com/random-photo-name.jpg” this makes creating photo galleries and slideshows much easier.Arbitrary HTML
Muse harnesses the power of having programming when needed. So in the case that you want to design a custom contact form or embed your Twitter and Facebook Feeds, Muse has an “Arbitrary HTML” Insert. You can add arbitrary HTML by going to “Object”–>”Insert HTML…” then paste your custom HTML code and click OK. Muse becomes the best of both design and programming with the added option of arbitrary HTML.
The Best Part!
I forgot about the best part of arbitrary HTML in Muse… You can use arbitrary HTML to insert Advertisements from Google’s AdSense program and actually earn yourself cold hard cash!
Sound too good to be true? Check it out: Make Money with Google AdSense Program
If you want me to write more about making effective websites for AdSense Ad campaigns, be sure to leave a comment below!
Add a Facebook Feed to Muse
For those who were wondering…
The truth about embedding HTML is that most social networking sites will have some sort of HTML widget to help the embed process. In the case of Facebook (and Twitter), they offer a handful of different widgets for your personal use.To start you can head to their social plugins page as a part of their developers resource found here: Facebook Social Plugins and choose which plugin you want to embed into your Muse website design.
You have options for each social plugin for the customization and look of your embedded plugin. Once you’ve filled in the options needed, there should be a button that says, “Get Code”. A window will appear and will immediately display two sections of code. The first is the Javascript SDK (Software Development Kit) and the second is the widget code. In order for the plugin to function properly you will need to paste both sections of code into your Muse project.
Copy the code to your clipboard and then paste it directly into your Muse project with Ctrl + V.
This should give you the desired Facebook plugin in your project. Test it out by previewing the page in the browser, and if things look work out that you’ve succeeded in embedding a Facebook feed/plugin.
Although this is specifically for Facebook only, the same concept can be applied to many other social sites out there such as Twitter. Information behind using social plugins can usually be found in the “Developers” section of a given social website.
Adding a Contact Form
So people can contact you…
You will have handful of different options for adding a contact form to your web design in Muse. One of the easiest ways to get a contact form is to use a third party form service such as JotForm
To set up a contact form using JotForm, go through the steps on the JotForm website to set up your contact form. (You will need to specify an email that your message will be sent to.) When everything is ready to be embedded into your Muse project, copy and paste the Embed code (provided by JotForm) straight into Muse using Ctrl + Z. At this point you should have the form you just created in JotForm appearing on the screen. You can position it however you like.The second option for creating a contact form is to make one using HTML, PHP, and CSS. This is a little more complex but I will briefly explain how it can be done.
The HTML Code:
Setting up a web form involves the <form> tag as well as multiple <input> tags.
As you will see in the script I’ve included, when the form is submitted it will execute the script called, “contact.php” and run the code that is in that file. The PHP program will take the information from the inputs of the form. Take a look at the arbitrary HTML you will add to Muse:
<form name=”contactform” method=”post” action=”contact.php”>
<div style=”float: left”><font color=#ceab53 >First Name: </font></div><div style=”float: right”>
<input type=”text” size=”20″ maxlength=”40″ name=”first_name”/> </div>
<br />
<br />
<div style=”float: left”><font color=#ceab53 >Last Name: </font></div><div style=”float: right”>
<input type=”text” size=”20″ maxlength=”40″ name=”last_name”/> </div>
<br />
<br />
<div style=”float: left”><font color=#ceab53 >Company (optional):</font> </div><div style=”float: right”>
<input type=”text” size=”20″ maxlength=”40″ name=”company”></div>
<br />
<br />
<div style=”float: left”><font color=#ceab53 >Email:</font> </div><div style=”float: right”>
<input type=”email” size=”20″ maxlength=”40″ name=”email1″></div>
<br />
<br />
<div style=”float: left”><font color=#ceab53 >Phone Number:</font> </div><div style=”float: right”>
<input type=”text” size=”20″ maxlength=”40″ name=”phone_number”></div></b>
<input type=”submit” value=”Submit” />
</form>
The PHP Code:
Due to the complexity (and extreme use of escape characters) of the PHP code involved, I will paraphrase the programming used and briefly explain the important pieces of code.
<html>
<body>
<?php
if (isset($_REQUEST[’email’]))
//if “email” is filled out, send email
{
//send email
$email = $_REQUEST[’email’] ;
$subject = $_REQUEST[‘subject’] ;
$message = $_REQUEST[‘message’] ;
mail(“someone@example.com”, $subject,
$message, “From:” . $email);
echo “Thank you for using our mail form”;
}
else
//if “email” is not filled out, display the form
{
echo “<form method=’post’ action=’mailform.php’>
Email: <input name=’email’ type=’text’ /><br />
Subject: <input name=’subject’ type=’text’ /><br />
Message:<br />
<textarea name=’message’ rows=’15’ cols=’40’>
</textarea><br />
<input type=’submit’ />
</form>”;
}
?>
</body>
</html>
The CSS Code (optional):
CSS is used for styling your form items and certainly isn’t necessary, but it sure makes it look good. The goal is to give you an introduction to styling forms.
.textShadow {
text-shadow:1px 1px 0px #ffffff;
}
.inputStyle {
-moz-box-shadow:inset 0px 1px 1px 0px #000;
-webkit-box-shadow:inset 0px 1px 1px 0px #000;
box-shadow:inset 0px 1px 1px 0px #000;
background:-webkit-gradient( linear, left top, left bottom, color-stop(0.05, #fff), color-stop(1, #dfdfdf) );
background:-moz-linear-gradient( center top, #fff 5%, #dfdfdf 100% );
filter:progid:DXImageTransform.Microsoft.gradient(startColorstr=’#fff’, endColorstr=’#dfdfdf’);
padding:4px 2px;
border:1px solid #dcdcdc;
}
.myButton {
-moz-box-shadow:inset 0px 1px 1px 0px #ffffff;
-webkit-box-shadow:inset 0px 1px 1px 0px #ffffff;
box-shadow:inset 0px 1px 1px 0px #ffffff;
background:-webkit-gradient( linear, left top, left bottom, color-stop(0.05, #ededed), color-stop(1, #dfdfdf) );
background:-moz-linear-gradient( center top, #ededed 5%, #dfdfdf 100% );
filter:progid:DXImageTransform.Microsoft.gradient(startColorstr=’#ededed’, endColorstr=’#dfdfdf’);
background-color:#ededed;
-moz-border-radius:6px;
-webkit-border-radius:6px;
border-radius:6px;
border:1px solid #dcdcdc;
display:inline-block;
color:#777777;
font-family:Verdana;
font-size:16px;
font-weight:bold;
padding:8px 24px;
text-decoration:none;
text-shadow:1px 1px 0px #ffffff;
}.myButton:hover {
background:-webkit-gradient( linear, left top, left bottom, color-stop(0.05, #dfdfdf), color-stop(1, #ededed) );
background:-moz-linear-gradient( center top, #dfdfdf 5%, #ededed 100% );
filter:progid:DXImageTransform.Microsoft.gradient(startColorstr=’#dfdfdf’, endColorstr=’#ededed’);
background-color:#dfdfdf;
}.myButton:active {
position:relative;
top:1px;
}
In case you got confused…
I can probably guess what you’re thinking, “I am lost after looking at all the programming.” True. I am a bit too. But If you’re able to wrap your head around this, you’ll have a great form design that increases the overall professionalism of your website. Some great informational resources can be found here:
HTML Forms
For learning about PHP form programming: Free PHP Contact Form
For styling forms using CSS: Style Forms with CSS
Upload your Website to the Internet
This is the best part!
When you’ve finished designing your website in Muse, you’re obviously going to want to upload it to the internet. You have a couple of options to do this.One, you can use Muses’ built-in hosting platform the Adobe provides via their business directive called, “Business Catalyst.” However, after I found out about their services and their pricing, I found that their very expensive for the services you get. I sought to find a better solution to getting my site on the internet.
The other option is to use a web hosting company (a company that you can buy server space and domains from.) I took some time to look for the best option for web hosting and found a great one. I decided to go with blue host because it proved to be the cheapest and more feature-wide option and I haven’t had any problems with them to date.
Once you’ve got your server space, you’ll need to upload your website to your server space using an FTP (File Transfer Protocol) Client. A great free one is called Filezilla. You can download it here: Download Filezilla Once you’ve got Filezilla installed you can use the login credentials given to you in email from iPage or you can find them in your hosting account. All you have left to do is transfer the exported website to your server space. If you haven’t already, export your website from Muse under “File –> Export to HTML…” With the website files exported, in Filezilla, transfer all the contents of the export folder to your server space and wait for the transfer to finish.
Now, when you go to your chosen domain, you will see your Muse website live on the internet.
If you have any questions about this part of the website development process, be sure to leave a comment at the bottom and I will get back to you as soon as I can. Thanks.
Submit an XML Sitemap
Let Google know your website exists…
To get your website added to the Google index is a big question that new web designers ask. The most common thing that people do is submit a sitemap or submit their website to the Google index.A sitemap is a file (either a .txt file or a .xml file) that contain the locations and names of all your pages. An example of a sitemap would can be illustrated like this:
Start of TXT file…
http://www.example.com/
http://www.example.com/page1.html
http://www.example.com/page2.html
http://www.example.com/page3.html
End of file…
This is the most basic of all sitemaps. It consists only of the names of your pages, each on a single line. This is enough for Google to recognize your sitemap.
Another one of the ways that you can do this is to generate an XML sitemap automatically through a service such as: XML Sitemap Generator This is a great tool to get a sitemap generated for you. You will also have the option of making a sitemap from scratch using a text editor. Google Webmaster tools help and info guide will help you set up a working text-based sitemap.
Some last things related to sitemaps, you will need to upload your sitemap to the root directory of website and then submit it through your webmaster tools. Another important thing to note would be that it may take a while for Google to read, crawl, and index your site on its search engine. The general rule is to be extremely patient and know that you’ll eventually make it on the Google index… unless your site break a lot of the rules that Google has set in place for websites. Anyways, good luck with the sitemaps.
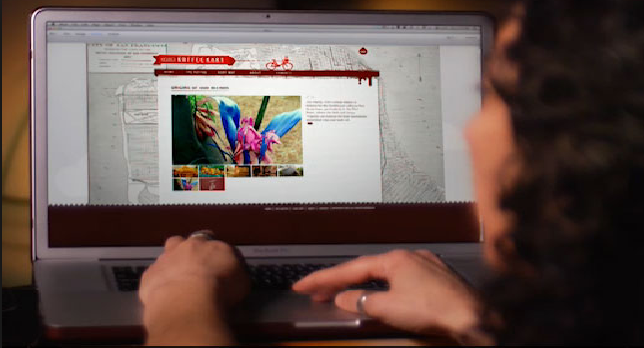
The Finished Product!
That’s it. Not too bad for the first website. Hope you enjoyed reading about the entire process! Do me a big favor and post any questions or comments that you might have. Thanks for reading!